|
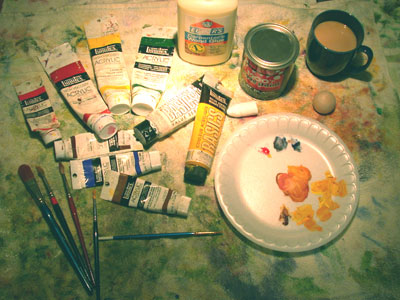
These are the supplies I used. Unfortunately, I don't have a picture
of the mailbox in the original poor condition.
My palette for this was limited to these colors;
* White
* Stove Paint Flat Black (Rutland) NOT RECOMMENDED!
* Raw Sienna
* Burnt Sienna
* Ultramarine Blue
* Hookers Green Hue Permanent
* Cadmium Yellow Medium
* Cadmium Yellow Light
* Cadmium Red Medium
* Naphtol Crimson
* A REALLY GOOD varnish/polyurethane (can't stress that enough!)
The brushes I used are old and worn out brushes, ranging from round
to flat, and one new liner brush for the detail work.
|
|
|
|
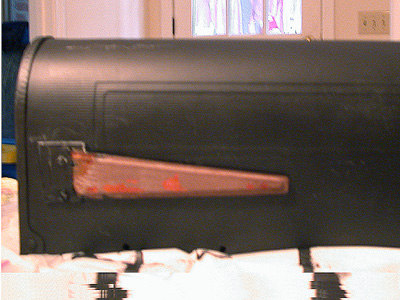
My first step was to make the blue mailbox black. I used a paint
that is used on wood stoves.I don't recommend doing this, at all!
Definitely start off with a colored mailbox.
|
|
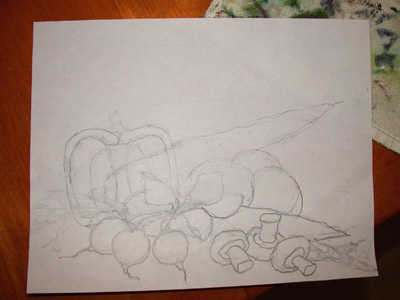
The next step was to translate my thoughts into a
sketch. From that sketch, I made a decent line drawing.
The line drawing enables me to visualize the layout
and make any adjustments to the composition. In this case, I decided
that it would be better to leave the leaves on the radishes off
because there was already so much green.
Once the line drawing is finished, it's time to transfer
it onto the surface. This is easy to do. Here's a brief explanation
on how to transfer;
* Rub the back of the drawing with chalk.
* Carefully place the drawing onto your surface
* With a pencil, trace over the line drawing. (Pressing hard is
not necessary.)
If you are careful, the chalk shouldn't rub off and
redrawing is not required.
|
 |
|
|
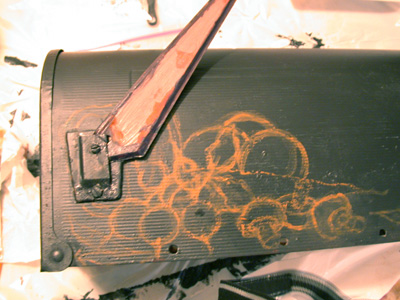
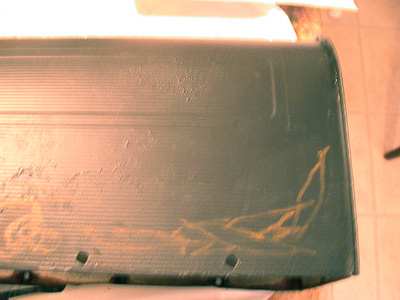
Because this side was not an even surface, and there was an image
beneath an image, it was difficult to use my normal chalk transfer
method. In this case, I drew by hand what I saw on my line drawing,
using watered down raw sienna paint. |
|
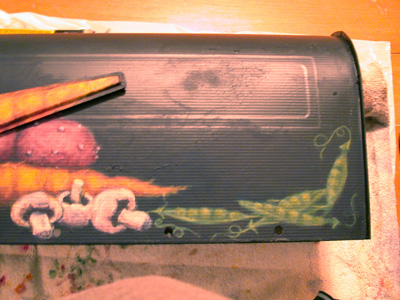
Here's the second half of the right side of the
mailbox, showing the peas..
|
|
|
|
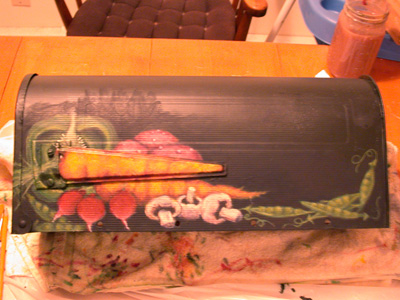
Here you can see the colors I've blocked in. This is basically the
first of MANY many layers. |
|
As the layers build, details begin to also evolve.
Although I try to work on the entire composition, at the same time,
in this photograph you can see the potatoes are fairly complete.
.
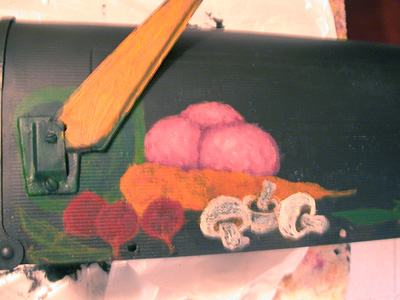
Notice how the Mail Flag is orange. I plan to do
a trompe l'oeil effect, making the flag virtually un-noticable unless
raised.
|
 |
|
|
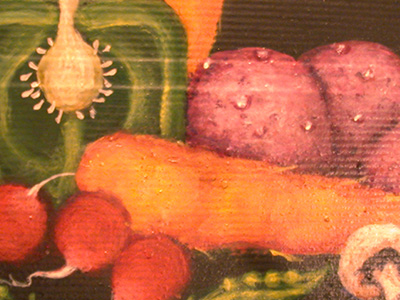
A lot of layers have been applied and still more will be added
as I work on the radishes, peas and mushrooms.
During the layering stage, I periodically take breaks to give a
polyurethane quick spray, to protect what I have done, thus far.
|
|
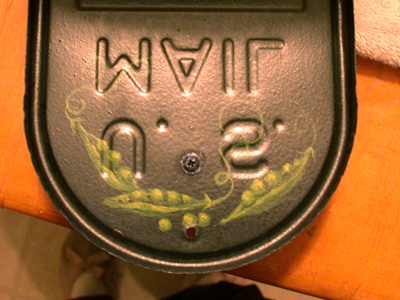
This is the second half of the right side's back.
|
 |
|
|
|
|
|
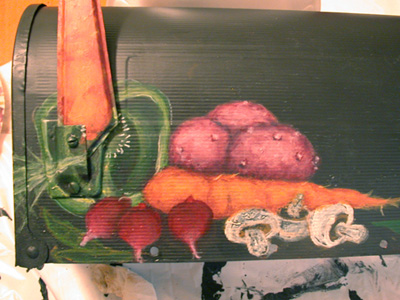
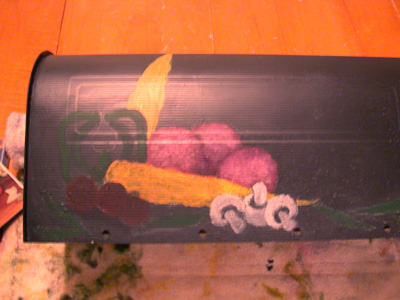
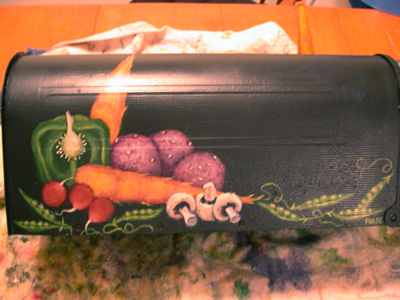
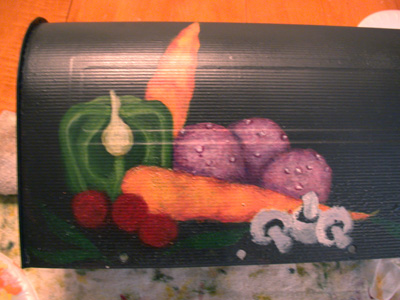
Here you can see the finished, front of the right side of the mailbox. |
|
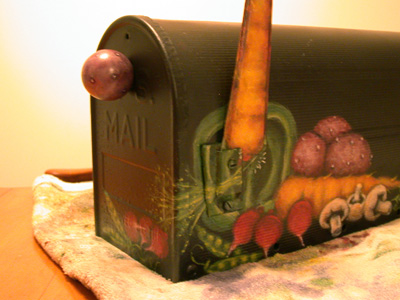
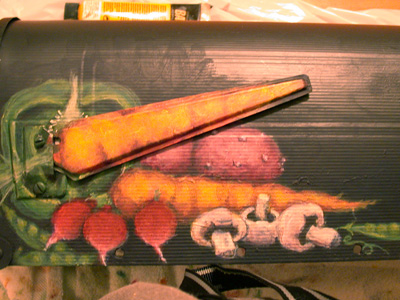
In this photograph, you can see how it looks, when
the carrot (flag) is raised.
|
 |
|
|
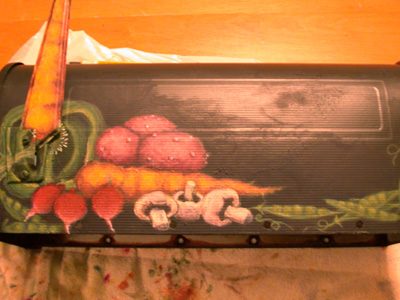
This is how it looks with the carrot in the down position. |
|
PAINTING THE OTHER SIDE OF THE MAILBOX
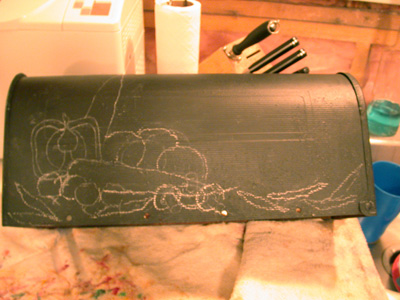
Here you can see the chalk transfer on the left side of the mailbox.
After tracing the image onto the mailbox, I rubbed some elements
off and place them in different sizes and places.
|
 |
|
|
Here you can see after the colors blocked in and some of the details
added., The painting is very similar to the right side.
One small change I made was to place the vertical carrot behind
the other vegetables, instead of in front as it is on the right
side of the mailbox.
|
| After more layers and details have been added. Many more layers
must still to be applied. |
 |
|
|
View shows the entire left side completed. |
|
Detail of left side.
|
 |
|
|
View with the mailbox door open |
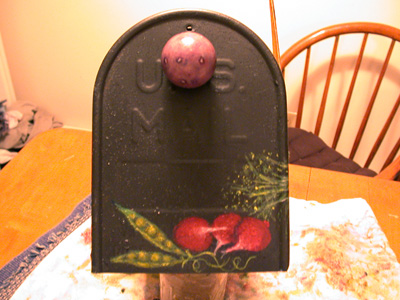
Here is a view of the front.
Since the mailbox was old and worn-out, the handle was missing.
I decided to use a round, wooden ball with a hole drilled in it.
I decorated it to look like the other purple potatoes.
To attach, I used a little bit of glue in the hole and screwed
the ball to the mailbox door.
|
 |
|
|
Side detail view of the front and side of the
mailbox. If you look carefully, you can see how the carrot's green
top wraps around the corner, from side to front.
|
|
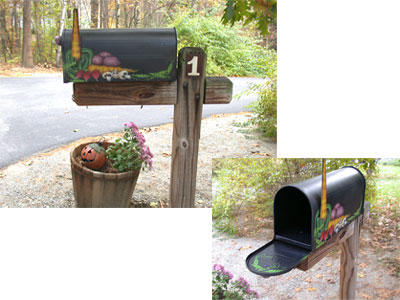
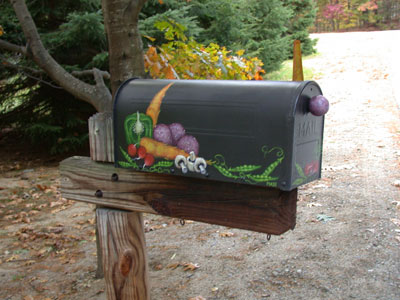
Here is where the mailbox resides!
|
|
|
The entire mailbox project, from the three (3) black basecoats
to the final spray, took approximately18 hours. This time also includes
the spray breaks, in between the layers. I must confess, I paint
slowly and with many layers; another artist could probably produce
this same piece in less time and others may work longer.
This was a fun project to do and I look forward to doing a more
season specific mailbox, next; maybe a Valentine's Day or Fourth
of July mailbox? Stay tuned...
|